
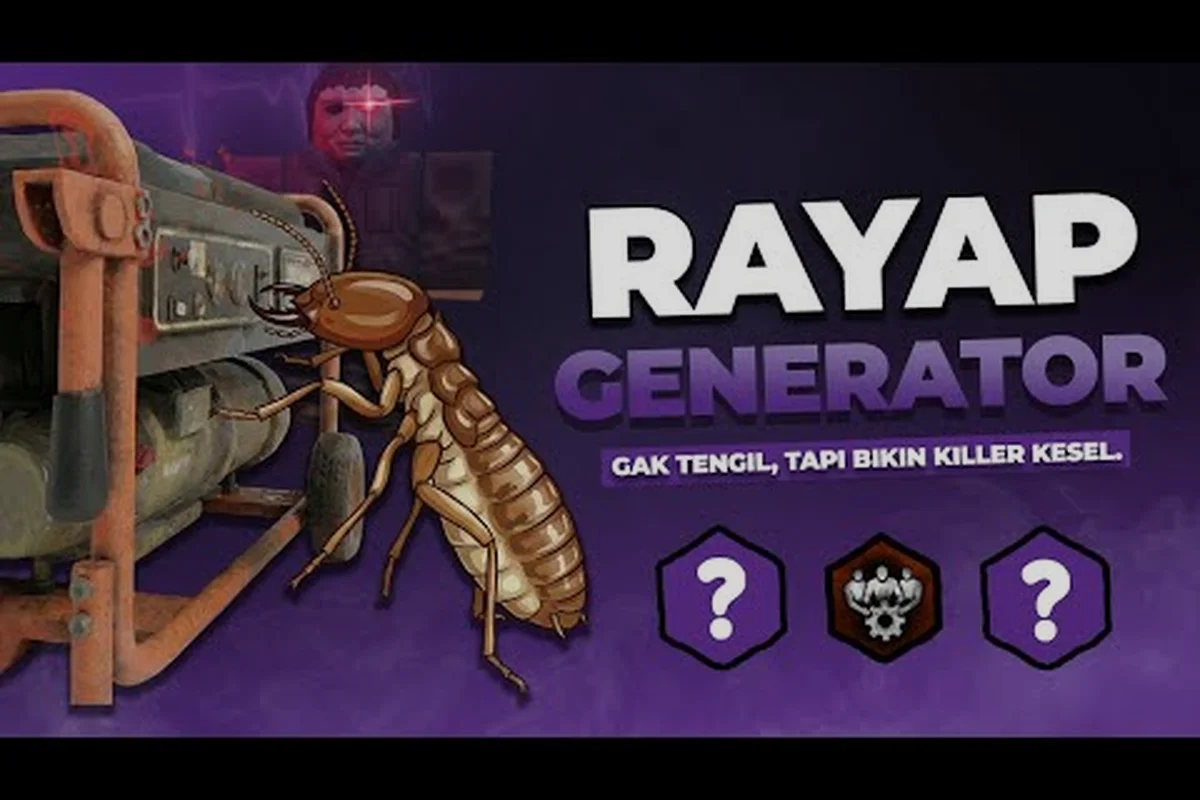
Violence District The Hidden stands out as one of the most punishing killers in the Roblox asymmetric survival title from developer VIOLENCE DISTRICT (groupId 8818124, placeId 93978595733734). Released on October 31, 2024 and still in ALPHA, the game pits five survivors against one killer across a series of dark, pallet-scarce maps, and The Hidden leans fully into that pressure with an invisibility power that forces survivors to play on its terms. With roughly 623K group members and 366K Discord users tracked on the official channels as of late September 2026, the community treats The Hidden as a mid-tier chase killer whose ceiling depends almost entirely on perk synergy and map awareness.
This guide breaks down everything you need to dominate matches with Violence District The Hidden: how the invisibility power actually works, the strongest perk combos, the chase routes that punish greedy survivors, and the survivor-side counters that experienced players reach for when they hear that telltale shimmer. The advice below is built on community testing, the official Violence District page on Roblox, and replay data shared by killers grinding the ALPHA ladder.
The Hidden Power, Cooldowns, and Stamina Economy
The Hidden is built around a single fantasy: hunt what you cannot see. Its core ability drops the killer out of the standard chase model and pushes survivors into an audio-only scramble. Understanding the stamina, cooldown, and visibility windows is the foundation of every decision you make in a match.
How Invisibility Works
When activated, The Hidden turns fully translucent. It cannot be seen at any meaningful distance unless a survivor uses a specific reveal perk or item. The power lasts roughly 7–9 seconds per cast based on community testing, with a cooldown that fluctuates between 18 and 22 seconds depending on add-ons currently in the ALPHA build. During the active window, the killer's terror radius behaves differently — instead of a steady heartbeat, survivors hear a faint, irregular pulse that is easy to misread in panic.
| Power Phase | Duration | Survivor Audio Cue | Optimal Use |
|---|---|---|---|
| Wind-Up | 0.8s | Single bass thump | Hold for ambush, not chase |
| Active Cloak | 7–9s | Irregular heartbeat, faint distortion | Closing distance, breaking LOS |
| Fade-Out | 1.2s | Loud heartbeat snap-back | Relocate, reposition |
| Cooldown | 18–22s | Standard terror radius | Pressure objectives, patrol pallets |
The wind-up is the most underrated part of the kit. Veterans on the official Violence District community Discord recommend holding the activation for a full beat before committing, because survivors who see the thump early will bolt toward a pallet. Patience here wins more chases than raw speed ever will.
Stamina, Terror Radius, and Movement Speed
The Hidden moves at the standard killer base speed (4.6 m/s in the ALPHA data set) while cloaked, but the perceived chase speed feels higher because survivors cannot break line of sight cleanly. Breaking a pallet while cloaked is the only way to cancel the cooldown penalty — if you break a wall mid-cloak, the timer freezes until the animation finishes.
-
Base speed: 4.6 m/s (no movement penalty while cloaked)
-
Break speed: Standard 2.4s for pallets, 3.1s for breakable walls
-
Terror radius while active: 12 meters (down from the standard 24m)
-
Stamina cost on basic attack: Same as other killers, 1 swing per chase segment
The reduced terror radius is the hidden gem of the kit. It lets you patrol generators from absurdly close positions without triggering the survivor instinct to run. Pair that with the 12m heartbeat and you can stand almost on top of a survivor working on a gen, which is something almost no other Violence District killer can do safely.
Layering Mobility and Info on The Hidden
A raw invisibility chase is only as good as the build wrapped around it. The current ALPHA perk pool rewards killers that layer mobility, information, and pallet denial. Below are the three loadouts that show up most often in high-Elo replay shares, plus the budget build for newer players.
Core Perks to Prioritize
| Perk | Slot | Why It Works on The Hidden | Synergy |
|---|---|---|---|
| Shadow Step | Slot 1 | Removes scratch marks for 6s after breaking LOS | Cloak + no marks = untraceable |
| Iron Grip | Slot 2 | 10% longer carried survivor wiggle timer | Buys time to relocate mid-carry |
| Blood Warden | Slot 3 | 20% longer end-game collapse after gates are powered | Sneaks late-game picks with cloak |
| Cruelty | Slot 1 (alt) | Pallet stuns grant 5% haste for 4s | Pallet break → cloak close |
Shadow Step is the single most-picked perk on The Hidden, according to replay data pulled from community trackers. The reason is simple: invisibility already kills visual contact, and removing scratch marks kills audio tracking. Survivors who try to loop by leaving marks at corners will lose you entirely for the 6-second window, which is long enough to reach a new angle of approach.
Iron Grip slots in for matches where teammates body-block hard. The Hidden has no built-in carry protection, so the 10% extra wiggle timer effectively gives you a free reposition to a hook without losing progress — but the real value shows up in tight basement corridors or multi-floor buildings where a well-timed Dead Drop can extend the carry far past the standard drop window. Pair it with awareness of common body-block spawns near generators and you can route through safer tiles instead of the nearest hook, cutting down on Flashlight squad save attempts entirely.
Budget Build for Newer Killers
If you are still leveling your perk roster for Violence District The Hidden, this three-perk combo works without any rare drops and mirrors the early-game chase pressure loop that new Abysswalker players tend to struggle with most during the first ten Bloodweb resets. Each perk here is unlocked through the first three web tiers, so you can slot the build within a single session, and the chase slowdown from Sloppy Butcher stacks additively with Predator's longer blood trails to effectively extend detection windows by roughly four to five seconds per loop, mimicking the tracking edge that defines Violence District The Masked in higher-tier play.
-
Predator (common) — Survivors leave blood trails 2 seconds longer
-
Sloppy Butcher (common) — Healing slowdown stacks with chase pressure
-
Bamboozle (uncommon) — Window vault speed boost after a vault break
Predator and Sloppy Butcher are both accessible through the early perk tree, and Bamboozle shows up in mid-tier reward packs. The trio will not carry you to the top of the ladder, but it teaches the discipline of layering small effects, which is the entire design philosophy behind Violence District The Hidden.
Applying Pressure Without Fast Downs
The Hidden is a pressure killer, not a down killer. You will rarely one-shot survivors; instead, you force injured survivors to crawl away from objectives and waste med-kit resources. Mapping out where to apply that pressure is what separates decent Hidden players from the ones who top the kill board every match.
Map-by-Map Pressure Routes
The ALPHA build ships with five maps, each with predictable pallet spawns. The table below summarizes the route most recommended by community guides and the Violence District Killer Guide video from experienced content creators.
| Map | Best Cloak Anchor | Pallet Priority | Hook Rotation |
|---|---|---|---|
| Asylum Block | Second-floor catwalk | Two ground-floor pallets | Hook basement, force rescue attempts |
| Subway Terminal | End-of-line tunnel | Central platform pallet | Hook far from exit gates |
| Dockside Warehouse | Forklift aisle | Crate-corner pallet | Hook on second floor, fall break |
| Forest Lodge | Tree line north | Window + pallet combo | Hook inside lodge to bait |
| Hospital Wing | Hallway T-junction | Hallway pallet only | Hook opposite end from active gen |
Notice how the Cloak Anchor column is always a chokepoint or vertical feature, not an open lane. The Hidden loses chases when it tries to run survivors across open ground; it wins chases by funneling survivors into tight geometry where audio cues become unreliable.
Hook Game and Tunnel Discipline
Because The Hidden is a pressure killer, tunneling is rarely the right call outside the very end of the match. Veteran killers instead rotate hooks in a three-hook pattern: hook survivor A, patrol the closest gen for 20 seconds, hook survivor B if exposed, return to A. This 3-2-1 hook rotation keeps all survivors injured while denying the unhooker a safe rescue window.
A common mistake is camping the hook. The Hidden has no defensive tool during a camp — the cloak is on cooldown and survivors can simply gen rush. Trust the perk value of Blood Warden for late-game camping if you must hold a hook, and even then only when both exit gates are powered.
Survivor Counters and How to Play Around Them
The Hidden is a strong killer, but it has clear windows. Survivors who know the meta will reach for the same three or four counters every match, and as a killer main you need to plan around those picks before the lobby even loads.
The Most Common Survivor Counters
| Counter | Trigger | Counter Strategy |
|---|---|---|
| Detect (perk) | Reveals cloaked killer every 30s | Track which survivor runs it, ignore first 25s after trigger |
| Flashlight + Aura read | Bright burst blinds during cloak | Face away before swing, bait flash then swing |
| Urban Evasion (perk) | Faster crouch while injured | Drop chase, pressure gen, return when cooldown ends |
| Borrowed Time (perk) | Unhook endurance for 8s | Tunnel the unhooker next chase, not the rescuer |
| Med-kit stacking | Fast self-heal after hit | Sloppy Butcher breaks stacks, apply early pressure |
Detect is the single most dangerous perk against The Hidden, because it removes the entire invisibility fantasy for 4 seconds on a 30s cooldown. If you spot a survivor running Detect, change your playbook: open chases with a standard terror radius approach, save the cloak for post-chase repositioning, and avoid ambushing that survivor directly.
A practical rule of thumb from the Violence District stealth tips guide is that any time a survivor is running a reveal-type perk, your win condition shifts from ambush to attrition. You will not outplay Detect in a straight chase, so lean on Sloppy Butcher, hook pressure, and gen disruption instead.
When to Swap Killers Mid-Lobby
If you load into a lobby and three survivors are running Detect, Flashbang, and Urban Evasion, the honest answer is to swap. The Hidden is not the right pick for that lobby. Killers like The Abysswalker or The Masked have better tools for high-reveal lobbies. The Violence District Abysswalker build guide covers that swap in detail if you want a backup main.
Comparing The Hidden to Other Violence District Killers
Knowing when to pick The Hidden over the rest of the roster is half the battle. The killer list in the current ALPHA includes The Abysswalker, The Masked, The Veil, The Cure, The Hunter, and The Slasher, each with a distinct fantasy. The Hidden sits in the middle of the power curve: stronger than The Veil in a 1v1 chase, weaker than The Cure in raw pressure.
Power Tier Snapshot (ALPHA, September 2026)
| Killer | Strength | Weakness | Best Map |
|---|---|---|---|
| The Hidden | Ambush, mid-chase reposition | Reveal perks, open maps | Asylum Block, Forest Lodge |
| The Abysswalker | Map-wide teleport, gen control | Long cooldown windows | Subway Terminal, Dockside |
| The Masked | Stalk and one-shot | Vulnerable during wind-up | Hospital Wing, Forest Lodge |
| The Veil | Phase shift through walls | Low chase mobility | Dockside Warehouse |
| The Cure | Anti-heal aura, gen slowdown | Weak chase power | Any open map |
| The Hunter | Trapper, zone control | Slow first chase | Subway Terminal |
The Hidden beats The Veil in a chase because Veil's phase shift does nothing to escape an invisibility rush. The Hidden loses to The Abysswalker in gen pressure because the Abysswalker can teleport across the map while The Hidden is locked into a chase timer. Pick The Hidden on maps with tight geometry and 2-3 survivor lobbies with low reveal-perk density.
When The Cure and The Hunter Outshine The Hidden
The Cure drops a healing-denial aura that stacks with The Hidden's chase pressure in theory, but in practice the aura overlaps so much with Sloppy Butcher that you lose perk diversity. The Hunter, on the other hand, is a zone-control killer that hard-counters looping on maps like Subway Terminal. If the lobby has 3+ experienced loopers, swap to The Hunter and trap the pallets instead of chasing through them.
For a deeper breakdown of every killer in the roster, the Violence District killer list guide catalogs each killer's power, add-on pool, and current ALPHA win rate. Cross-referencing that list with the lobby before you commit is a habit that will lift your kill count fast.
Late-Game and End-Game Collapse Tactics
The Hidden is at its strongest in the final 90 seconds of a match, when survivors are splitting between exit gates and the last generator. This is the moment to lean fully into Blood Warden and the cloak's reposition power.
Exit Gate Strategy
When both gates are powered, the standard 3-2-1 hook rotation collapses. Switch to a 1-1-1 pattern: hook one survivor, patrol the unpowered gate, hook the next survivor, then move to the powered gate. The Hidden's cloak lets you cross the map in a single cast, which means you can show up at either gate before survivors expect you. Pair that with Blood Warden's 20% longer collapse, and you have a 30-second window where survivors cannot escape even if they unhook and dash.
A common late-game mistake is to camp the powered gate. Survivors will simply use the unpowered gate, and you will be locked out of one entire exit. Instead, stand 12 meters from the powered gate with your cloak on cooldown, wait for the unhook animation, then trigger the cloak and close the distance. The audio distortion of your terror radius during active cloak often causes survivors to panic-miss the unhook button entirely.
End-Game Collapse Add-On Picks
If you have add-ons unlocked, the late-game build swaps in two pieces from the table below — Hollow Lens and Pulse Dampener — because their cloak-extension and terror-radius-suppression effects stack multiplicatively with The Hidden's base kit, letting a coordinated Killer pilot hold the gate-zone for an extra 4–5 seconds compared to running either perk solo. The third slot rotates between Smoke Choke (reposition after cloak) and a map-dependent flex pick depending on whether you're hunting The Abysswalker or The Masked mains who rely on audio cues.
| Add-On | Effect | Why It Matters Late |
|---|---|---|
| Hollow Lens | Cloak duration +2s | Lets you hold the gate longer |
| Pulse Dampener | Terror radius while cloaked reduced to 8m | Survivors cannot hear you until last second |
| Smoke Choke | Fade-out +0.5s | Extra reposition window after cloak ends |
These are ALPHA-stage add-ons and may shift as the developer tunes the meta. Always check the current patch notes on the Violence District official Roblox group before locking in a build, because the dev team has been hot-swapping perk values every few weeks during the ALPHA cycle.
Frequently Asked Questions
Is The Hidden a good killer for beginners in Violence District?
Yes, The Hidden is one of the more forgiving killers for new players because the cloak forgives bad pathing. If you lose LOS on a survivor, you can reactivate the power and reset the chase. The main learning curve is the wind-up timing, which takes about five matches to internalize.
What is the best perk build for The Hidden right now?
Shadow Step, Iron Grip, Blood Warden, and Cruelty is the top-tier ALPHA build according to community trackers. For a budget version, swap Shadow Step for Predator and Iron Grip for Sloppy Butcher, which are both early-tree perks that teach the same fundamentals.
How do I counter survivors running the Detect perk?
Do not chase the Detect user directly in the first 25 seconds after they reveal you. Pressure generators instead, and only re-engage the Detect survivor when their perk is on cooldown. Detect is a 4-second window, so outside of that window you are still invisible.
Can The Hidden one-shot a healthy survivor?
No, The Hidden cannot one-shot. The cloak is a chase and reposition tool, not a damage tool. You still need two hits to down a healthy survivor, just like most other Violence District killers. Pair the cloak with a pallet break or vault to close distance faster and land the second hit.
Should I pick The Hidden or The Masked on Forest Lodge?
Pick The Hidden. The Masked's one-shot fantasy requires a long stalk wind-up, which experienced survivors read on Forest Lodge's open tree line. The Hidden's cloak closes distance in a single cast and plays well into the map's tight lodge interior.